
Final Updates - August 2011
Hey, so this time I'm writing from January 20th 2012! I'm in the process of updating the entire blog, and I noticed that there's a whole 7 months of progress missing here...and I seriously have no idea why. I guess I must've forgotten to post them here or something.
Anyway, I'll just be listing the different WIP snapshots in sequential order with what comments I have on the process now that I'm looking back on it ;)
Finally, after a year of work, the pieces fit and the project came to a close... it was a relief, and at the same time I had a bit of trouble letting it go and accepting that it was done. And, finally, the last Video Tour of the project:
Thanks for all your support, everyone! 'til next time!
MeshWeaver, January 20th 2012
December 29th 2010
Hey, so this time I'm writing from January 20th 2012! I'm in the process of updating the entire blog, and I noticed that there's a whole 7 months of progress missing here...and I seriously have no idea why. I guess I must've forgotten to post them here or something.
Anyway, I'll just be listing the different WIP snapshots in sequential order with what comments I have on the process now that I'm looking back on it ;)
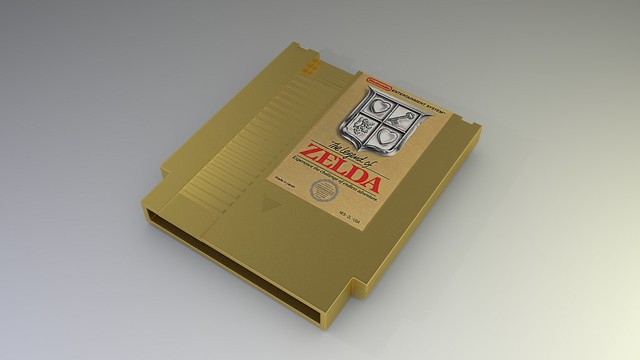 |
| Final render of the cartridge, with finalized materials. |
 |
| Basic materials coming together for the console. |
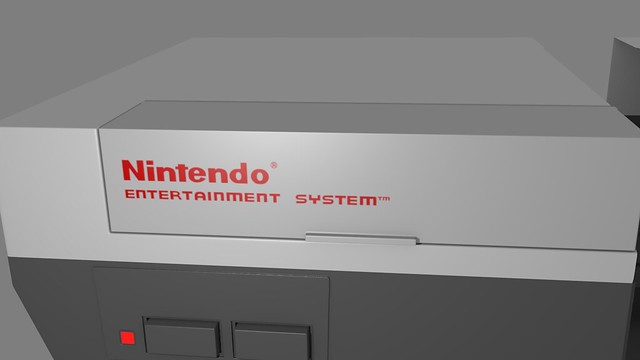 |
| First test with the front decal. |
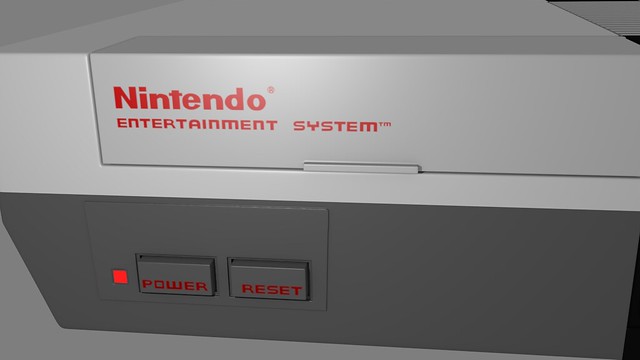 |
| MOAR DECALZ! |
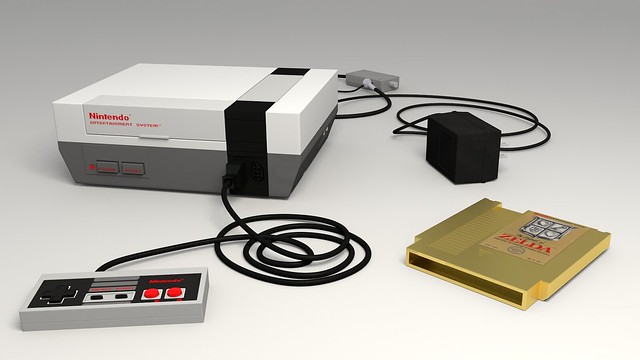 |
| And, after a couple of weeks of intense texturing and fighting with the Materials and Lighting, the FINAL RENDER! :D |
Finally, after a year of work, the pieces fit and the project came to a close... it was a relief, and at the same time I had a bit of trouble letting it go and accepting that it was done. And, finally, the last Video Tour of the project:
Thanks for all your support, everyone! 'til next time!
MeshWeaver, January 20th 2012
December 29th 2010
Get ready for some huge updates!
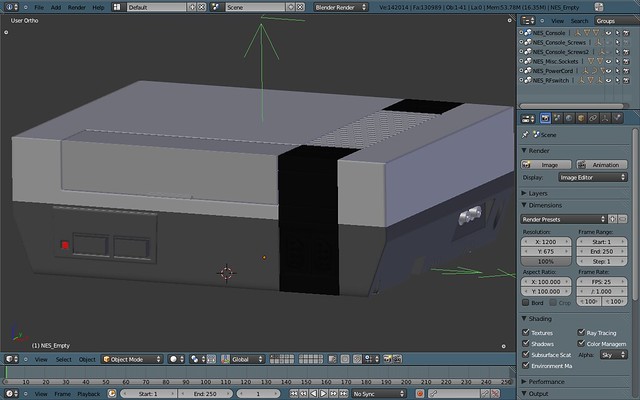
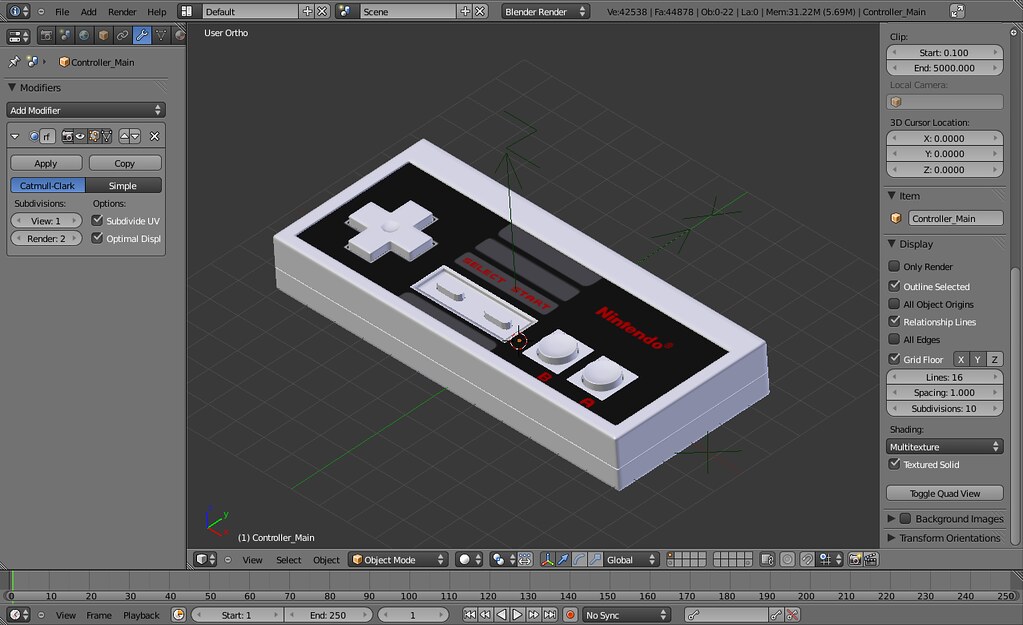
So, first off, a few weeks back I did a little test to see what the final scene would look like. It isn't rendered or anything, just a screenshot of the 3D Viewport, but still, it gave me an idea of what I was actually going for.
 |
| ...a lot of Path modifying (for the cables) will be waiting for me... |
And then, over the last week or so (not counting the time I spent fighting with my laptop to get it working properly again) I finally started texturing some of the objects!
I actually had to completely rebuild the UV map for this, as the proportions were completely off O_o I have absolutely no idea how that happened...anyway, moving on:
 |
| Render #1 |
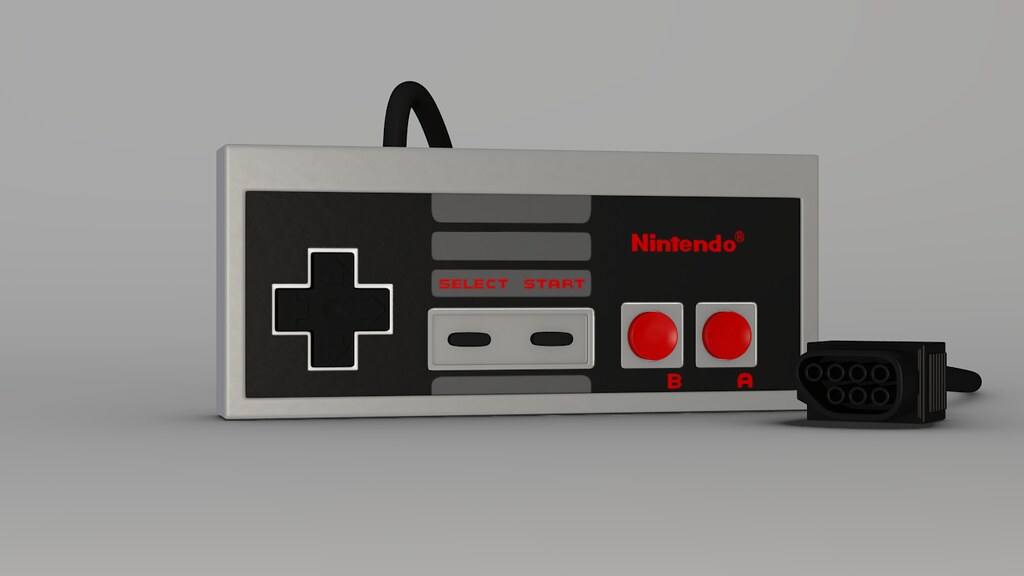 |
| Final Render |
And then the cartridge, one of the center-pieces of the scene:
 |
| My first texturing attempt for the cartridge |
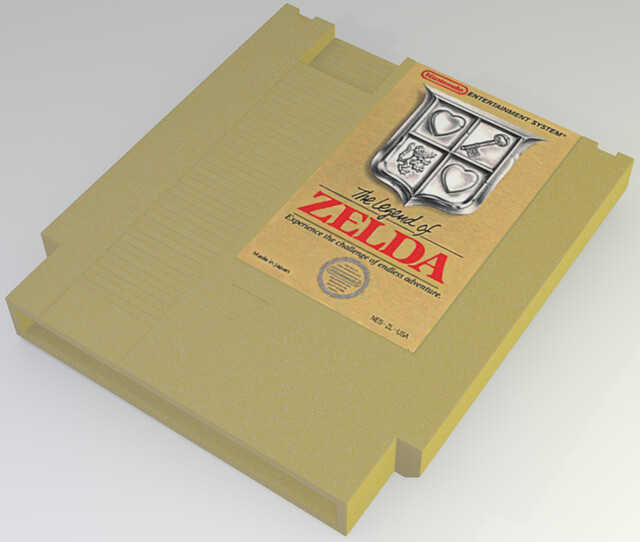
And, finally, my latest (and awesomest) render so far :
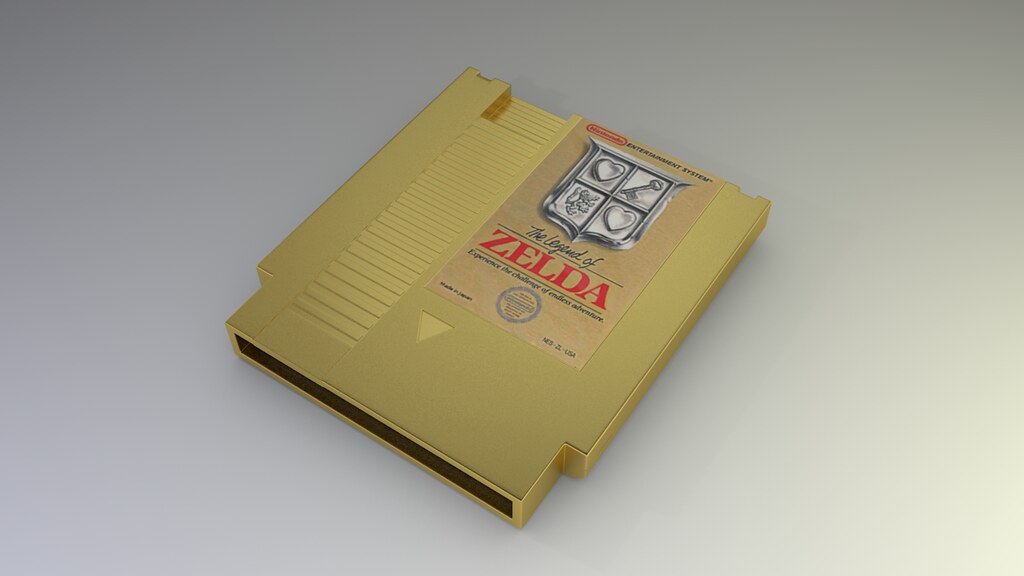 |
| It looks...real! |
There are some big thank yous in order though. More specifically, to Quandtum and Levisarts over on BlenderArtists.org - they really helped me get that cartridge looking the way it is now, I was really struggling with it.
The final material was initially developed by Quandtum, and he supplied the *.blend file, so I created a similar material to test it out, and although it looked great, it wasn't fit for the cartridge, it was much too rough. So after a lot of tweaking and actually creating a smoother duplicate of the material for certain sections, there's the final result.
As for the lighting of this piece, the thanks go to Levisarts - his area-lamp-based tutorial really helped make the two final renders come to life, they look really much more realistic.
I've realized in recent weeks that I don't think I could've gotten this far in the project without everyone's support and encouragement, so while I'm talking of thank yous I want to send a big one out to all my "followers" (as they're called on Twitter). You've all been a driving force behind this project, sometimes I really felt like it was going to take forever...but then I'd read one of your great comments and it would bring me back up and push me to really make this the best I can.
Anyway, may the Blend be with you!
------------------------------------------------------------------------------------
December 14th 2010
So, over the weekend I finally made some real progress on the project, especially on Sunday - I listened to Sonic the Hedgehog music the entire time I was modelling, so that probably helped - you know, he's....fast. Really fast. "Faster than the speed of sound!"
Anyway, enough about Sonic and other random stuff, time for some WIP pictures!
 |
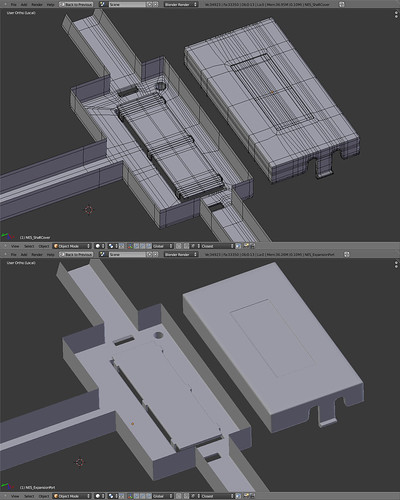
A snapshot of the input panel on the back of the television.
|
 |
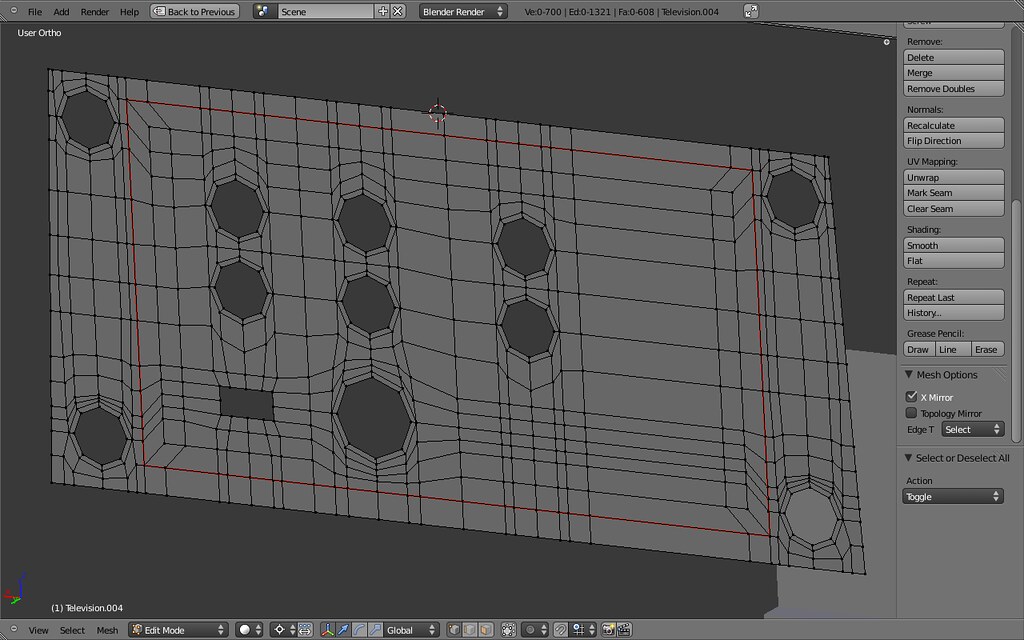
And an overview of the entire mesh in progress.
|
 |
And, a few hours later, a "Clay Render" of the final model!
|
However, almost an hour after that render, it was already out of date - I re-modified the curve of the screen and a few other things.
I also got a big surprise when I posted the results on the BlenderArtists WIP Thread - a fellow Blenderhead named Ssawyer posted a great video-response to my project, which kinda made me fall out of my chair (in my head, at least):
On top of the great comments, he had some really great suggestions for bringing down the vertex count on some of the objects - mainly the screws. So, by following along with the video, I rebuilt the screws almost completely, but with 240 less vertices, which was really, really awesome.
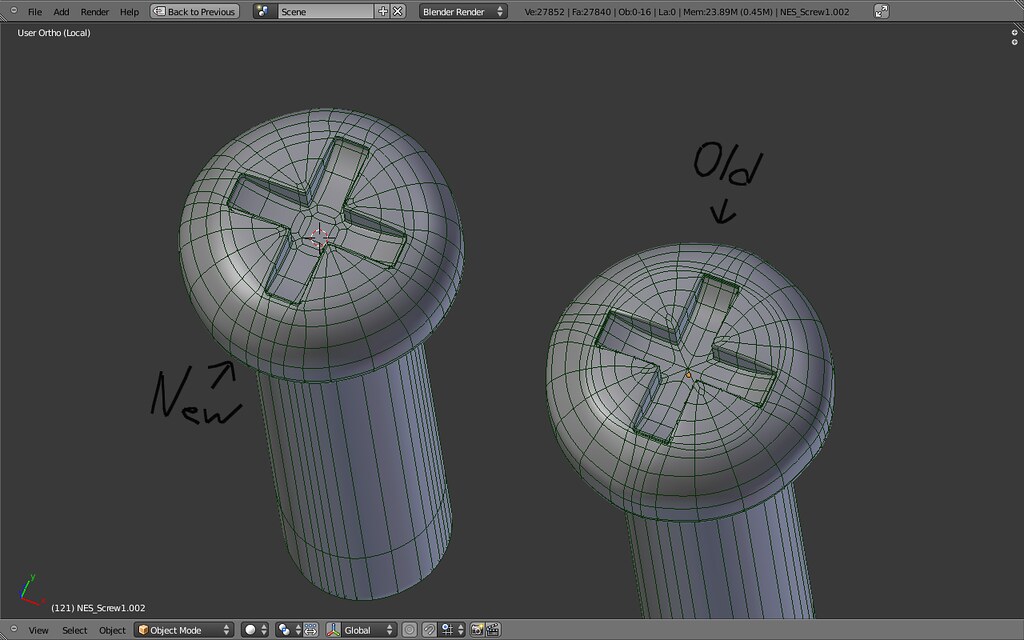 |
The difference is subtle, but it's enough to bring down the vertex count by 1/4
|
Also learned a new keyboard trick - Shift-Alt-S, or "Set to Sphere" - which I know will be super useful, I've been looking for something like it for a long time :D Ssawyer's been really supportive and encouraging, I got another great reply from him on DeviantART - I found him there because of his video, actually, hahaha.
Well, that's it from me for now. May the Blend be with you!
------------------------------------------------------------------------------------
November 29th 2010
Just finished the head of the screw I'll be using everywhere on the console pieces!
On the left is my first try, with a structure similar to those of the 3D Magnemite; on the right is the final version, which is much nicer :D
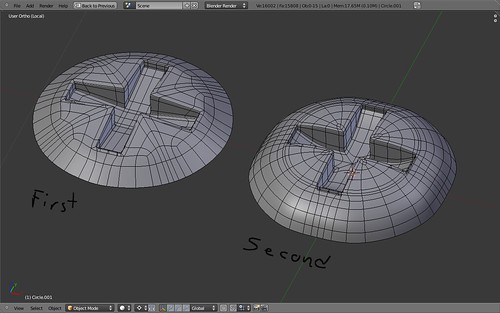 |
| Planning your topology ahead of time really helps. |
Took about as long to make both, but I took a bit more time to think about the topology I needed before actually starting on the second cap, which really made a difference. I usually do a 50/50 of topology planning and topology improvisation/tweaking.
That corner on the inside of the bit-head was kinda tough though - I ended up incorporating it's sharpening edge-loops into it's structure instead of them being easily removable and editable.
The final one (on the right) isn't 100% circular, but once I get to the actual thread-section I'll fix that up :D
------------------------------------------------------------------------------------
November 28th 2010
Adding in some overlooked details... :D
 |
| Topology...sometimes a pain to get right, but also quite fun! |
Still a few left in other spots (screws, insets, etc.) but I'm not sure how easy they'll be to add in.
Screws are fun to do though, I made some once for my 3D Magnemite so I'm very curious to try again with my improved modelling skills :D
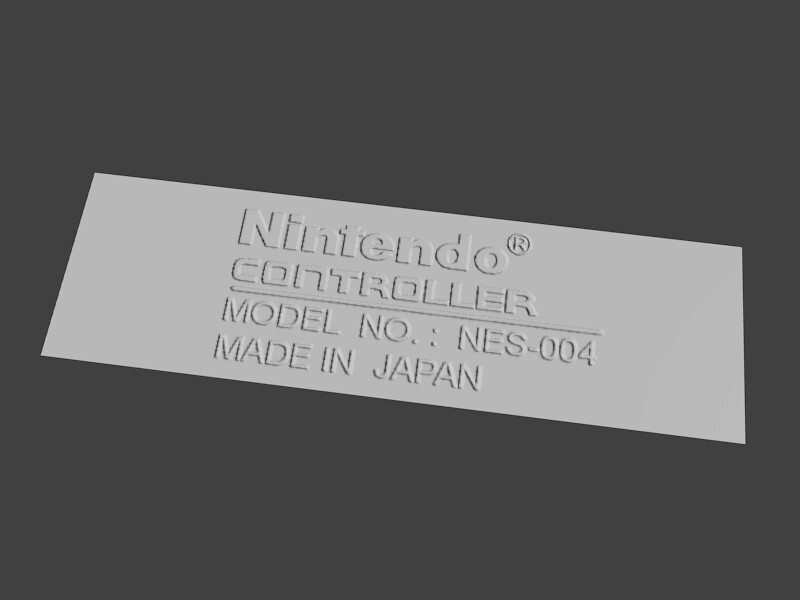 |
| Version 1 - Bump Map of 586x177 |
 |
| Version 2 - remade the Bump Map at a resolution of 1600x483. |
------------------------------------------------------------------------------------
November 18th 2010
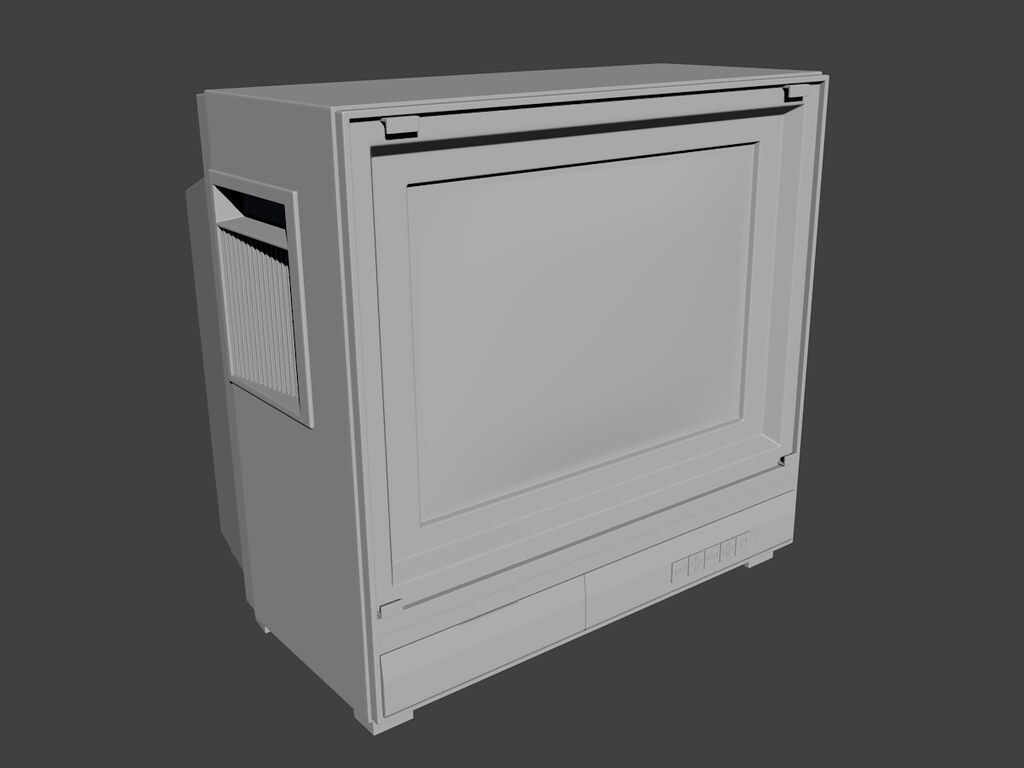
Some progress on the Television for the scene:
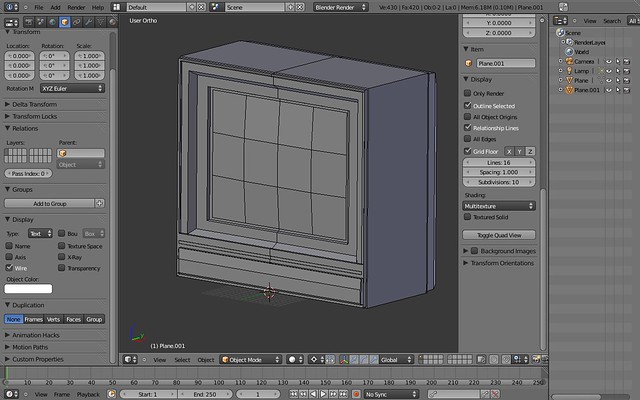 |
| "...where'd the controls go?" |
Still the base mesh, but it's supposed to be a ~20 year-old 13" Emerson :) it's picture quality is still super-good, thankfully.
------------------------------------------------------------------------------------
November 16th 2010
A new video tour has been uploaded!
Also, I realized that I'd forgotten to embed the previous videos in here, so might as well do it now:
Skyward Sword Celebration Project Tour 4 - HD from MeshWeaver on Vimeo.
Skyward Sword Celebration Project Tour 3 - HD from MeshWeaver on Vimeo.
Skyward Sword Celebration Project Tour 2 - HD from MeshWeaver on Vimeo.
Skyward Sword Celebration Project Tour 1 - HD-ish from MeshWeaver on Vimeo.
--------------------------------------------------------------------------------------
October 6th 2010
Little update :D
(not shown on the picture : all the plugs and cables for the NES. the adapter heads are kinda tough to make, but quite fun too, since I really have to think about how I shape them, while still trying to keep the vertex count at a reasonable level.)
--------------------------------------------------------------------------------------
September 5th 2010
So as you can see, a turntable render of the NES game cartridge. Included in the video are both the default clay render turntable and a Wire version, for those of you curious about the topology :D
I also used Blender's built-in video editor for the first time to put this together :D Went very well, and I definitely like the organization method - the various columns and things.
Anyway, here's the video. Vimeo version is in queue for conversion - have to wait an hour before this 25-second video is converted, it's ridiculous. Seems to me that the video conversion time should be judged by how long it is and the image quality...anyway, before I branch off again, here's the video, for real this time:
...I might have rendered it kinda fast, even though it was at 17 frames per second. Maybe a slower animation would have been better, though the method I used doesn't really allow for much customization. I have to figure that out, there's going to be turntables of every object. :D At least, I think...
--------------------------------------------------------------------------------------
August 27th 2010
Hmm, I've posted pictures about this on DeviantART more often than I post about it here...weird.
Anyway, I've made a lot of progress since the first post, considering it was at the beginning of July. Lots of W.I.P pictures too, as you can see:
July 25th
July 29th
July 29th again
and my latest upload:
August 26th
You can really see an evolution of the mesh, starting with the outlined plaques, holes for the screws and various other pieces, and then I filled them in, and basically the actual NES console is pretty much finished, though it's still missing the Subsurf modifier, which will really bring up the vertex count.
I just finished this part of the controller's cable socket, though those square holes aren't in :

Shoot, I guess I have to add them now :( ;)
Now all I have to do is fix the socket, add the screw holes to the controller (which I accidentally forgot to do), make all the cables, add the Subsurf to everything, create Materials and image textures, take my old TV mesh (which is on my Flickr Photostream, if you're curious - see Flickr box in the sidebar -->) and kick it up a notch or three to bring it up to my current skill level, figure out how to do glow with Nodes, and set up the scene :D at least most of the modelling is done... Modelling this project is great fun, I'm really enjoying figuring out how to shape the stuff :D
--------------------------------------------------------------------------------------
July 9th 2010
Hey Blenderheads, and non-Blenderheads :)
So I've started working on this project again. I'd started it a while back (shortly after E3), but hadn't worked on it in a while. I've made a lot of progress today though :
then, the mesh for the...thing, is almost finished:
...so? :)
edit - now the "thing" is finished, btw. had a few problems, such as the cord entrance, and then some joining issues (one of the pieces merged with another, and it wasn't supposed to, so that caused some pretty serious normals problems)...but all in all, i think it's done. was fun :) now I just have to make the rest of the darn thing...it's fairly complex
Okay, wait. Was that you? When the video's over and it shows you other ones, and you click on "Skyward Sword's Graphics," is that you?
ReplyDeletenope, that's not me :P if I remember correctly, that's the Zelda Universe video...
ReplyDeleteOh. Okay.
ReplyDeleteDude, that looks awesome! I love the gold Nes card thingie!:O
ReplyDeleteLotsa luck on your next progect!
Yours truly, Nintendo fan aka your teenee breuh aka muki-ara681!